CentOS 6.5 - Web サーバ Nginx 構築(ソースインストール)!
Updated:
前回は CentOS 6.5 サーバで Fetchmail による複数ドメイン宛メールの集約を行いました。
今回は Web サーバ Nginx の構築(ソースをビルドしてインストール)を行います。
0. 前提条件
- CentOS 6.5(x86_64) を Minimal で最小インストールしている。
- クライントマシンは Linux Mint 14(64bit) を想定。
- ソースを取得し、ビルドしてインストールする。
- 当記事執筆時点で最新の安定版 1.4.4 をインストールする。
- 過去にこのサイトを参考にして作業した際に記録していたものを参照している。
1. 必要パッケージインストール
ソースビルドに必要なパッケージをあらかじめインストールしておく。
# yum install gcc pcre pcre-devel zlib zlib-devel openssl openssl-devel
2. アーカイブダウンロード
# cd /usr/local/src
# wget http://nginx.org/download/nginx-1.4.4.tar.gz
# tar zxvf nginx-1.4.4.tar.gz
3. ビルド・インストール
configure, make, make install でインストールし、バージョンアップ時にリンク先を変更するだけで済むようリンクを設定する。
# cd nginx-1.4.4
# ./configure --prefix=/usr/local/nginx-1.4.4 \
--user=nginx \
--group=nginx \
--pid-path=/var/run/nginx.pid \
--error-log-path=/var/log/nginx/error.log \
--http-log-path=/var/log/nginx/access.log \
--lock-path=/var/run/nginx.lock \
--with-http_ssl_module \
--with-http_realip_module \
--with-http_stub_status_module
# make
# make install
# ln -s /usr/local/nginx-1.4.4 /usr/local/nginx
# cd
configure オプションの --with-http_stub_status_module は今後 munin で stub_status を用したいため。
4. インストール確認
# /usr/local/nginx/sbin/nginx -V
nginx version: nginx/1.4.4
built by gcc 4.4.7 20120313 (Red Hat 4.4.7-4) (GCC)
TLS SNI support enabled
configure arguments: --prefix=/usr/local/nginx-1.4.4 --user=nginx --group=nginx --pid-path=/var/run/nginx.pid --error-log-path=/var/log/nginx/error.log --http-log-path=/var/log/nginx/access.log --lock-path=/var/run/nginx.lock --with-http_ssl_module --with-http_realip_module --with-http_stub_status_module
5. 設定
設定は、取り急ぎデフォルトのままとした。
6. 起動スクリプト
Nginx サービス起動用スクリプトを以下のように作成する。
File: /etc/rc.d/init.d/nginx
1
2
3
4
5
6
7
8
9
10
11
12
13
14
15
16
17
18
19
20
21
22
23
24
25
26
27
28
29
30
31
32
33
34
35
36
37
38
39
40
41
42
43
44
45
46
47
48
49
50
51
52
53
54
55
56
57
58
59
60
61
62
63
64
65
66
67
68
69
70
71
72
73
74
75
76
77
78
79
80
81
82
83
84
85
86
87
88
89
90
91
92
93
94
95
96
97
98
99
100
101
102
103
104
105
106
107
108
109
110
111
112
113
114
115
116
117
118
119
120
121
122
123
124
125
126
127
128
129
#!/bin/sh
#
# nginx - this script starts and stops the nginx daemon
#
# chkconfig:   - 85 15
# description:  Nginx is an HTTP(S) server, HTTP(S) reverse \
#               proxy and IMAP/POP3 proxy server
# processname: nginx
# config:      /usr/local/nginx/conf/nginx.conf
# config:      /etc/sysconfig/nginx
# pidfile:     /var/run/nginx.pid

# Source function library.
. /etc/rc.d/init.d/functions

# Source networking configuration.
. /etc/sysconfig/network

# Check that networking is up.
[ "$NETWORKING" = "no" ] && exit 0

nginx="/usr/local/nginx/sbin/nginx"
prog=$(basename $nginx)

NGINX_CONF_FILE="/usr/local/nginx/conf/nginx.conf"

[ -f /etc/sysconfig/nginx ] && . /etc/sysconfig/nginx

lockfile=/var/lock/subsys/nginx

make_dirs() {
   # make required directories
   user=`$nginx -V 2>&1 | grep "configure arguments:" | sed 's/[^*]*--user=\([^ ]*\).*/\1/g' -`
   if [ -z "`grep $user /etc/passwd`" ]; then
       useradd -M -s /bin/nologin $user
   fi
   options=`$nginx -V 2>&1 | grep 'configure arguments:'`
   for opt in $options; do
       if [ `echo $opt | grep '.*-temp-path'` ]; then
           value=`echo $opt | cut -d "=" -f 2`
           if [ ! -d "$value" ]; then
               # echo "creating" $value
               mkdir -p $value && chown -R $user $value
           fi
       fi
   done
}

start() {
    [ -x $nginx ] || exit 5
    [ -f $NGINX_CONF_FILE ] || exit 6
    make_dirs
    echo -n $"Starting $prog: "
    daemon $nginx -c $NGINX_CONF_FILE
    retval=$?
    echo
    [ $retval -eq 0 ] && touch $lockfile
    return $retval
}

stop() {
    echo -n $"Stopping $prog: "
    killproc $prog -QUIT
    retval=$?
    echo
    [ $retval -eq 0 ] && rm -f $lockfile
    return $retval
}

restart() {
    configtest || return $?
    stop
    sleep 1
    start
}

reload() {
    configtest || return $?
    echo -n $"Reloading $prog: "
    killproc $nginx -HUP
    RETVAL=$?
    echo
}

force_reload() {
    restart
}

configtest() {
  $nginx -t -c $NGINX_CONF_FILE
}

rh_status() {
    status $prog
}

rh_status_q() {
    rh_status >/dev/null 2>&1
}

case "$1" in
    start)
        rh_status_q && exit 0
        $1
        ;;
    stop)
        rh_status_q || exit 0
        $1
        ;;
    restart|configtest)
        $1
        ;;
    reload)
        rh_status_q || exit 7
        $1
        ;;
    force-reload)
        force_reload
        ;;
    status)
        rh_status
        ;;
    condrestart|try-restart)
        rh_status_q || exit 0
            ;;
    *)
        echo $"Usage: $0 {start|stop|status|restart|condrestart|try-restart|reload|force-reload|configtest}"
        exit 2
esac
7. 起動スクリプト権限設定
作成した Nginx 起動スクリプトに実行権限を付与する。
# chmod +x /etc/rc.d/init.d/nginx
8. サービス起動
# /etc/rc.d/init.d/nginx start
nginx を起動中:                                            [  OK  ]
もしくは
# service nginx start
nginx を起動中:                                            [  OK  ]
9. 自動起動設定
# chkconfig nginx on
# chkconfig --list nginx  # <= 2,3,4,5 が "on" であることを確認
nginx           0:off   1:off   2:on    3:on    4:on    5:on    6:off
10. ログローテーション
ログが肥大化しないようログローテーションの設定をする。
File: /etc/logrotate.d/nginx
1
2
3
4
5
6
7
8
/var/log/nginx/*.log {
    missingok
    notifempty
    sharedscrits
    postrotate
        [ ! -f /var/run/nginx.pid ] || kill -USR1 `cat /var/run/nginx.pid`
    endscript
}
11. 動作確認
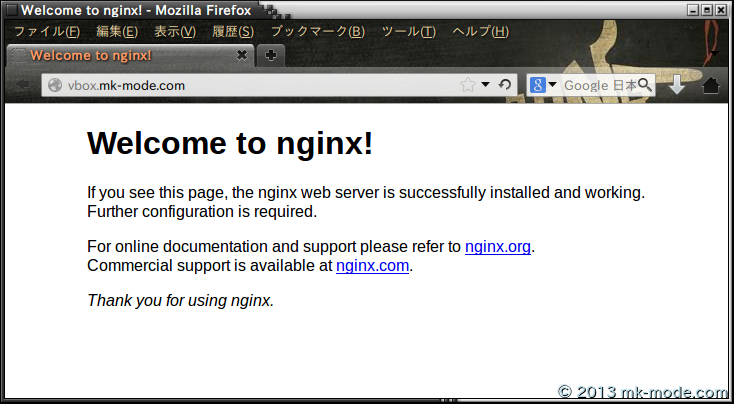
ブラウザで http://<サーバ名>/ にアクセスしてみて以下のように表示されればよい。

12. その他設定
今回はデフォルト設定で構築したが、実際には詳細に設定する。
今回のシリーズでは紹介しないが、当ブログ過去記事をそのまま参考にすることができるだろう。
参考サイト
次回は、DB サーバ MariaDB の構築について紹介する予定です。
以上。

Comments